

I wasn't the biggest fan of "Suicide Squad" but I did like the costumes. I already made Harley's main outfit, but I also like this dress she wears in a flashback scene. The original dress is made of metal mesh, with a black and gold diamond pattern.
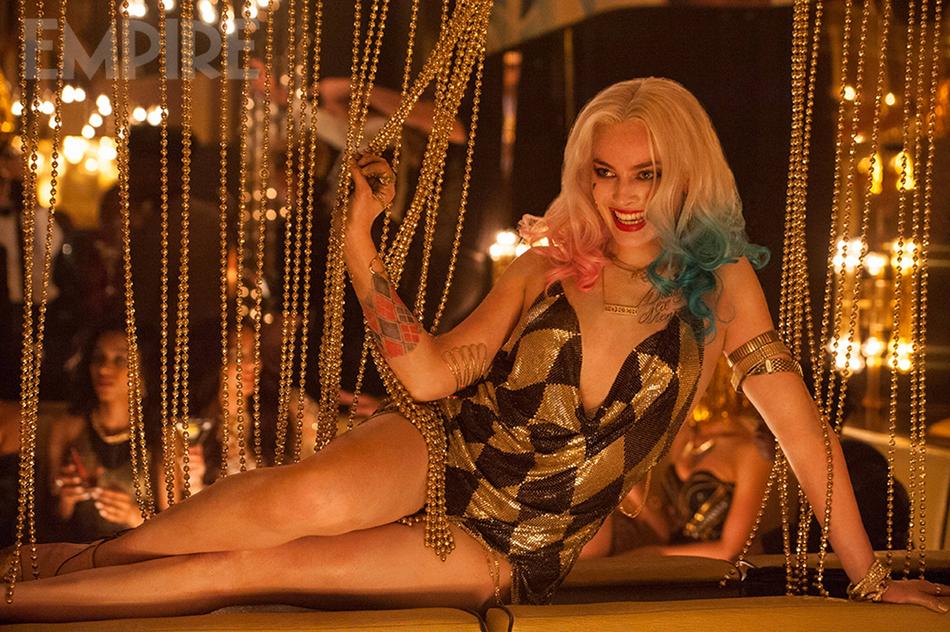
Although I quite liked this design, I wanted to try something a little different. I decided to make a dress based on this one, but in red and black.
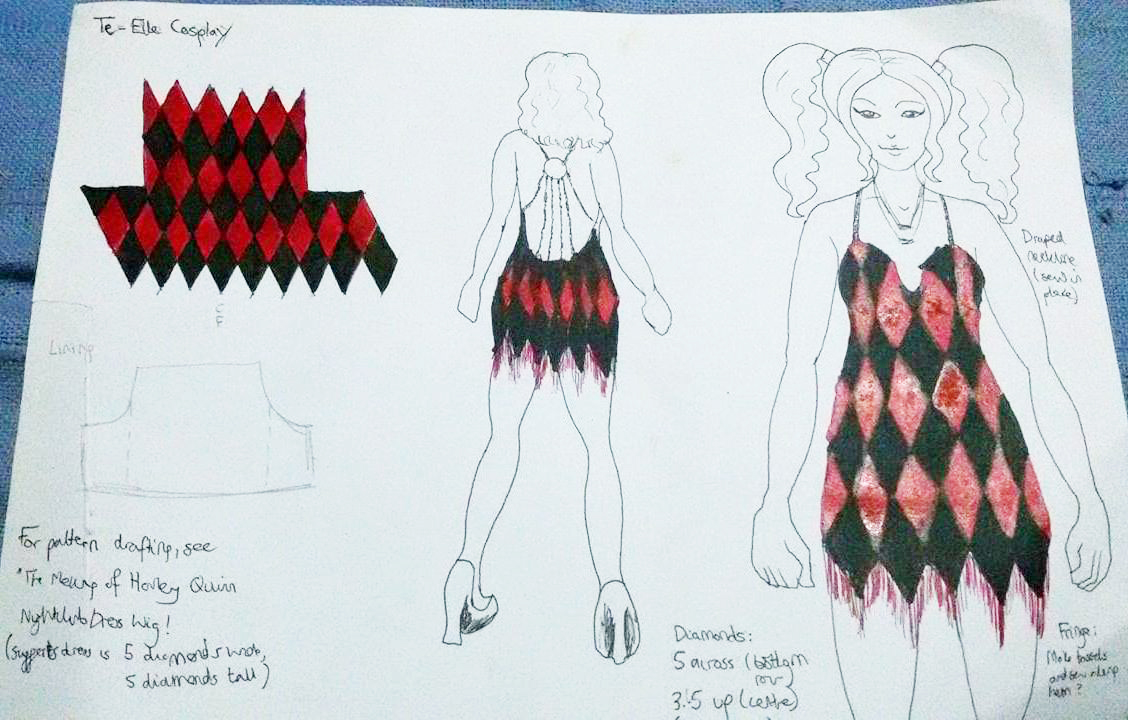
Here's the design I drew up.
I looked at a LOT of tutorials to make this dress, and I'll provide links to them here, as they were incredibly useful.
METAL MESH
The Making of Harley Quinn Nightclub Dress + Wig! (Suicide Squad Cosplay/Halloween Costume Tutorial) by Natasha Rose
Ebbi Cosplay ♡ The making of Harley Quinn club dress by Ebbi Cosplay
OLD FOOTAGE: Clubbing Dress BTS by Laura Gilbert
SEQUINS
Making Harley Quinn's Club Dress-Suicide Squad | Part 1 by Arlena Fae
Making Harley Quinn's Club Dress-Suicide Squad | Part 2 by Arlena Fae
Harley Quinn Club Scene Dress Tutorial by TEoELLE
How I Made My Harley Quinn Club Dress//COSPLAY TUTORIAL by EverSoMeTutorials
DIY VESTIDO ARLEQUINA (HARLEY QUINN CLUBE DRESS) 3 Formas by DIY Talitah Sampaio
OTHER
HARLEY QUINN CLUB DRESS TUTORIAL // Ally Sorge by Ally Sorge
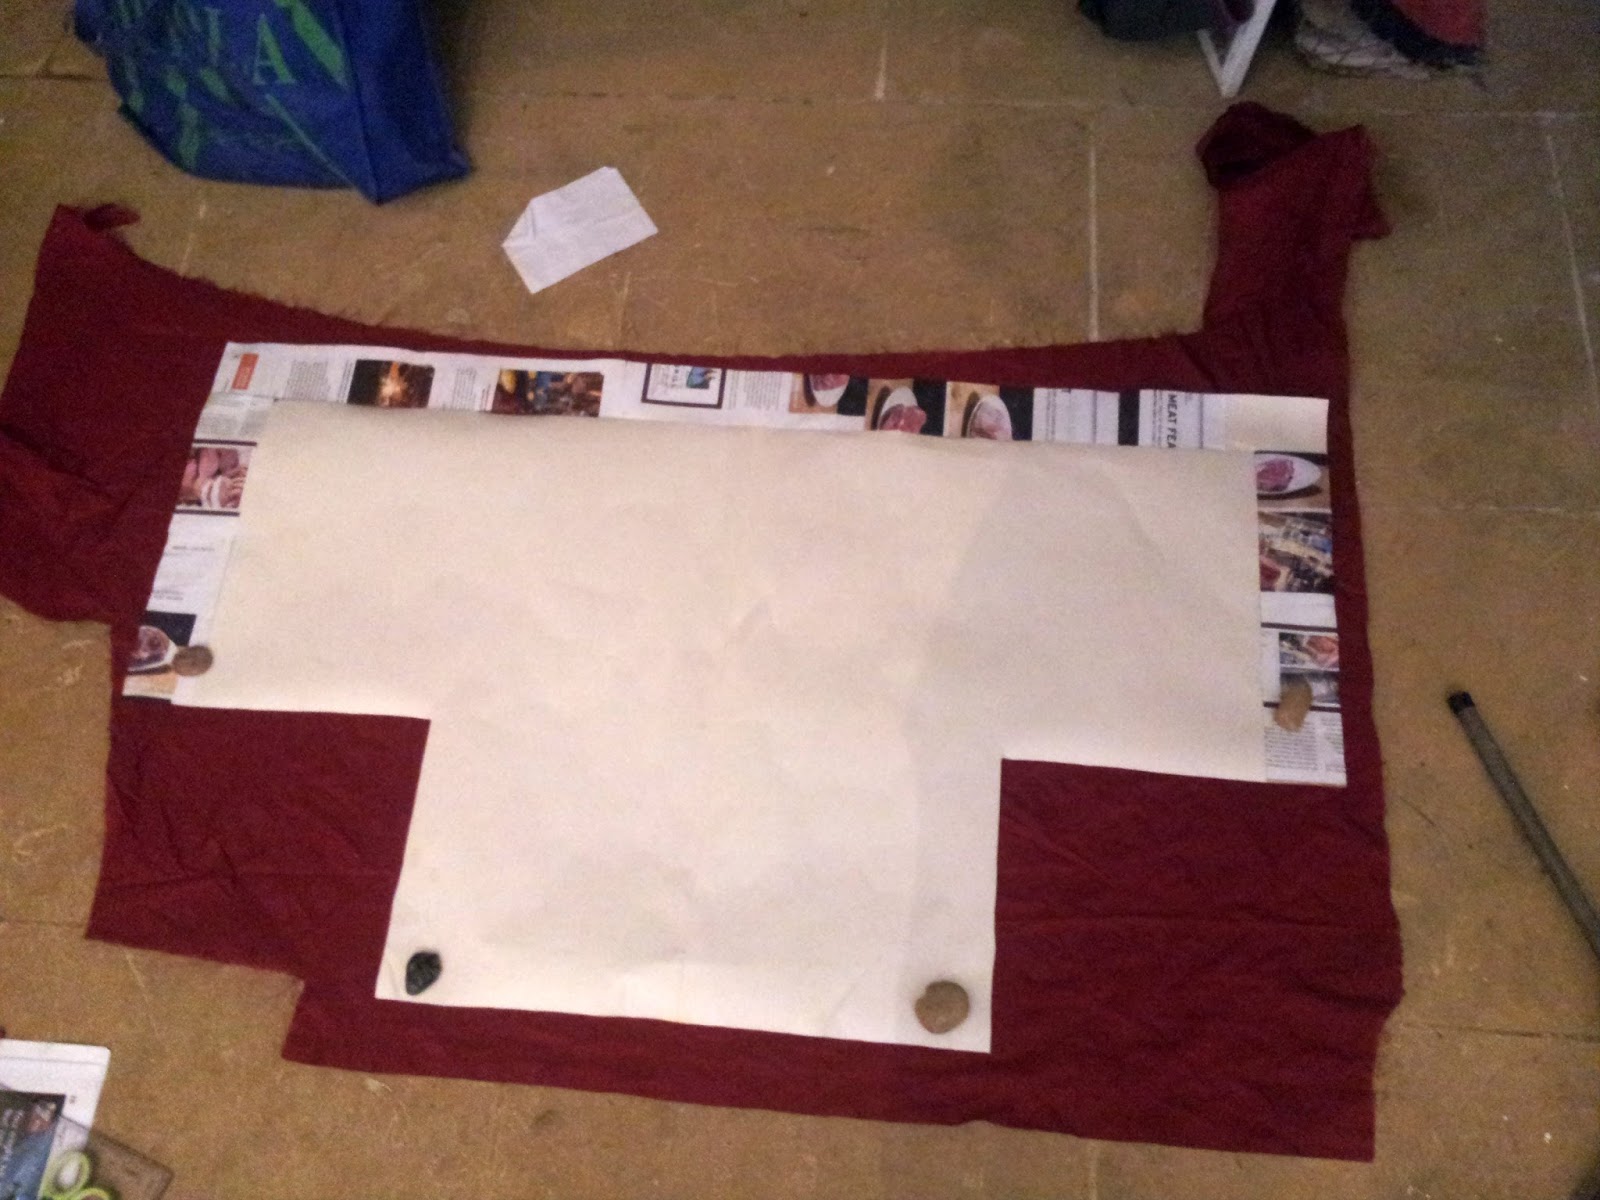


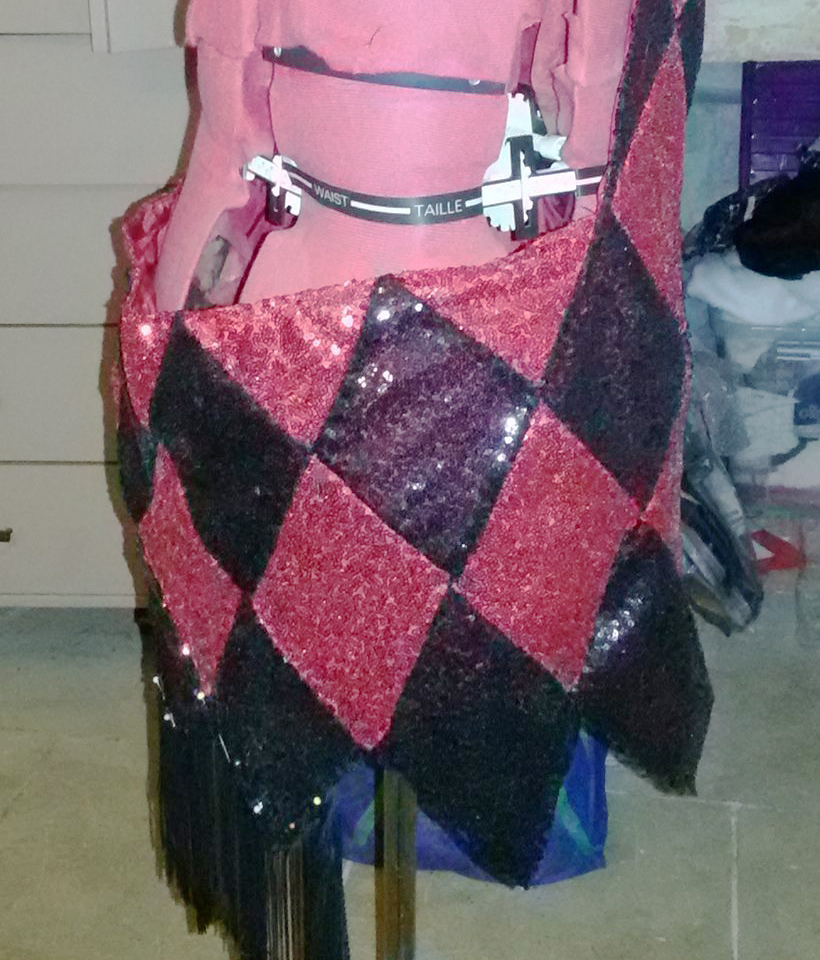
Once I was happy with the lining, I had to do some maths to calculate the size of the diamonds, and how many I would need. The basic mathematics is as follows:
Height of the dress / number of diamonds
Width of the dress / number of diamonds
You can use these figures to draw a grid and work out the size of your diamonds. My diamonds were approximatley 17cm by 11cm. I made a template and added seam allowance (about 1cm)


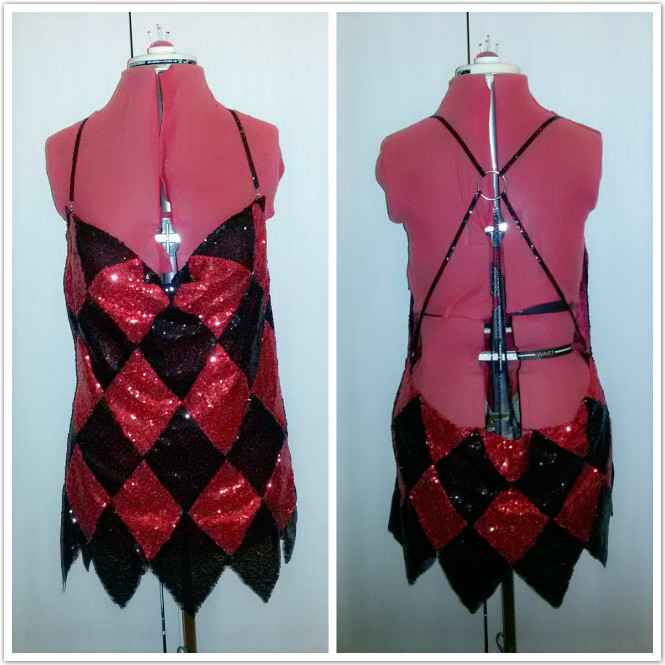
The Straps
So unfortunatley I forgot to take pictures when I was making the straps, but I can easily describe the process.
I bought some thin black elastic and black sequins, measured the straps to the correct length, then sewed on the sequins by hand. This took a while. I had to keep adjusting the straps' length, so I wish I had waited until later to sew on the sequins.
Once the straps fitted well, I sewed on jump rings to both the dress and straps, and attached lobster clasps. The other end of the strap was sewn to the metal ring. The metal ring is a curtain ring, as I couldn't find a metal ring in the right size.
For the chain, I cut pieces of black chain to the correct length. The pieces near the middle are a little shorter, while the pieces on the outside are a bit longer. The chains are attached to the ring with jump rings, and to the dress also with jump rings (the rings are held in place with elastic).
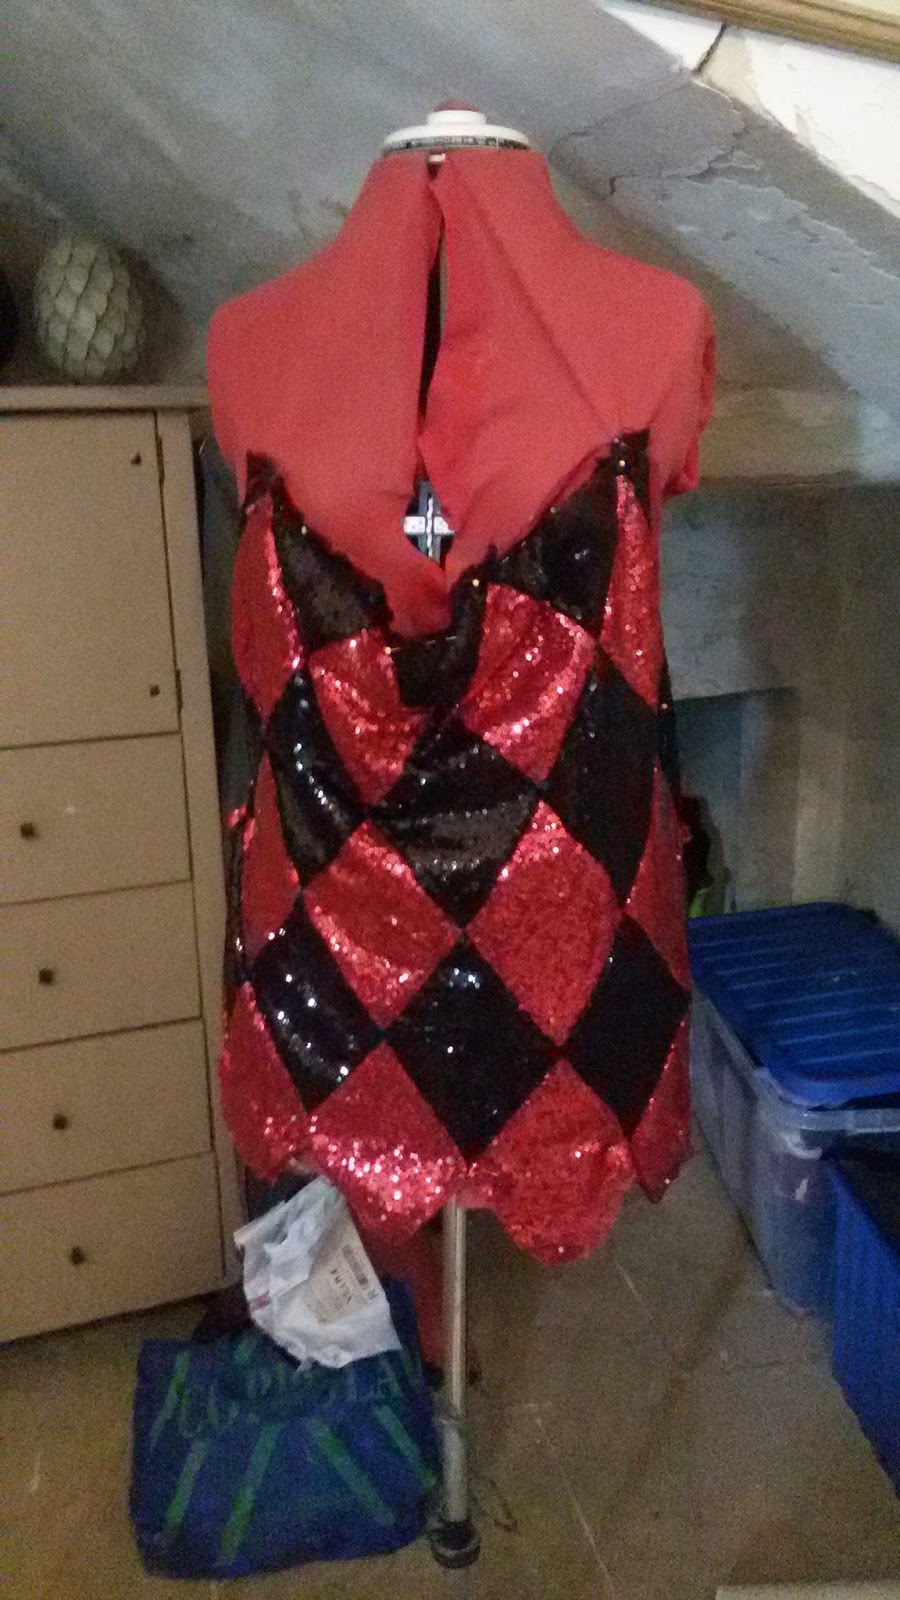
 I have seen versions of this dress where the makers used sequin material to make the fringe. I didn't want to deal with loose sequins falling off the dress (my room is already covered with sequins from cutting out this dress; every time I think I've cleaned them up I find ten more).
 To sew the fringe on, I turned up the hem and pinned it in place.
Next I cut a piece of fringe and pinned it to the hem, then sewed it on using a zigzag stitch (I think the particular type of stitch I used is called a lingerie stitch)

There were a few bald spots in the fringe. To fix this, I cut small pieces of fringe and glued them in place with fabric glue (I will sew them in place later). This type of fringe is annoying as it tries to unravel very quickly.
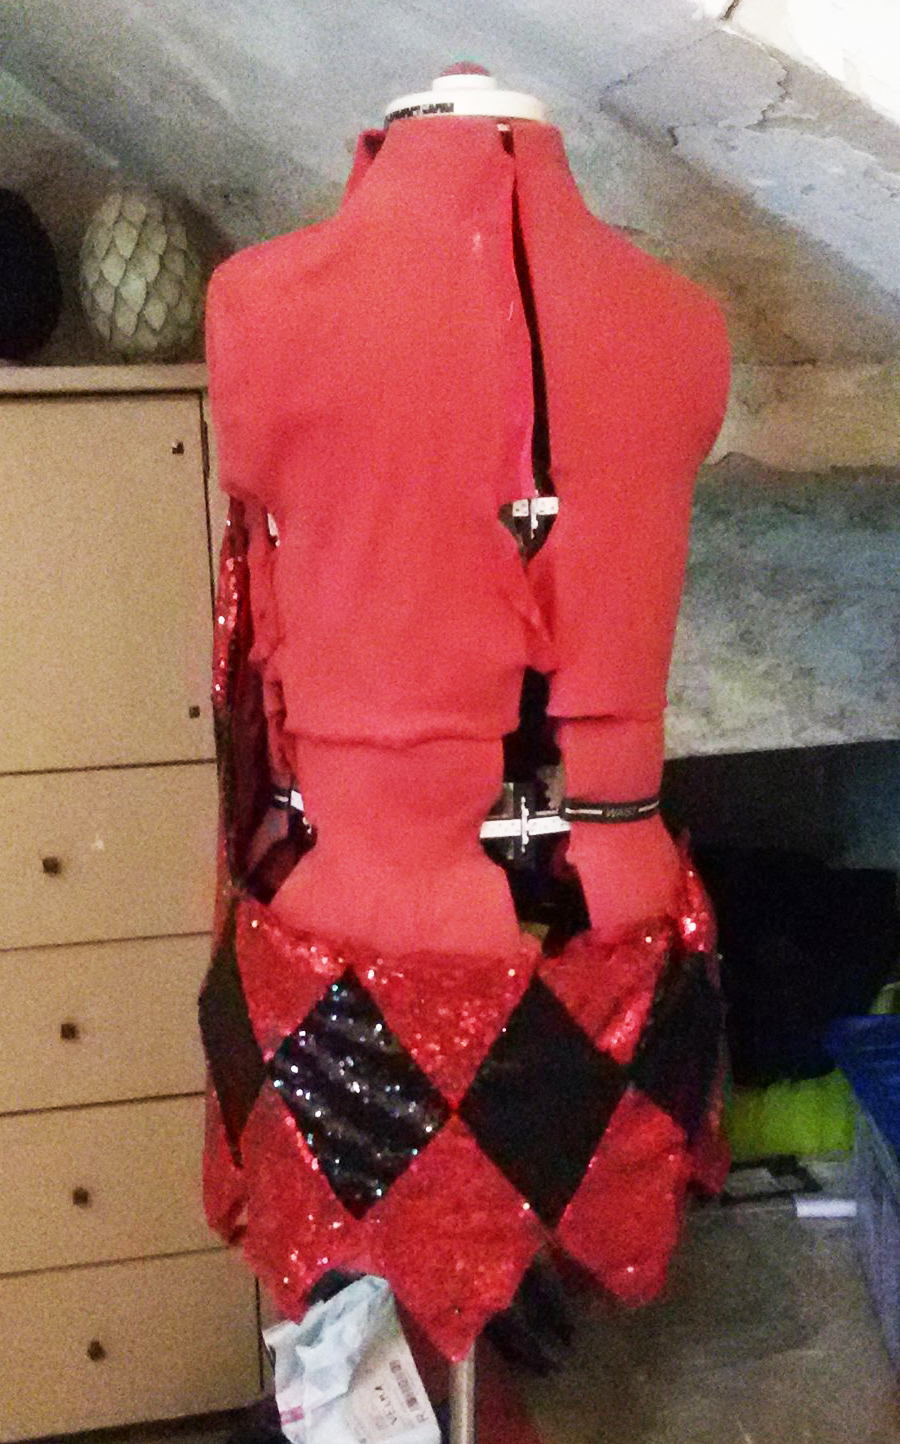
Improving the fit
The dress was very loose at the back, as you can see in the pictures.
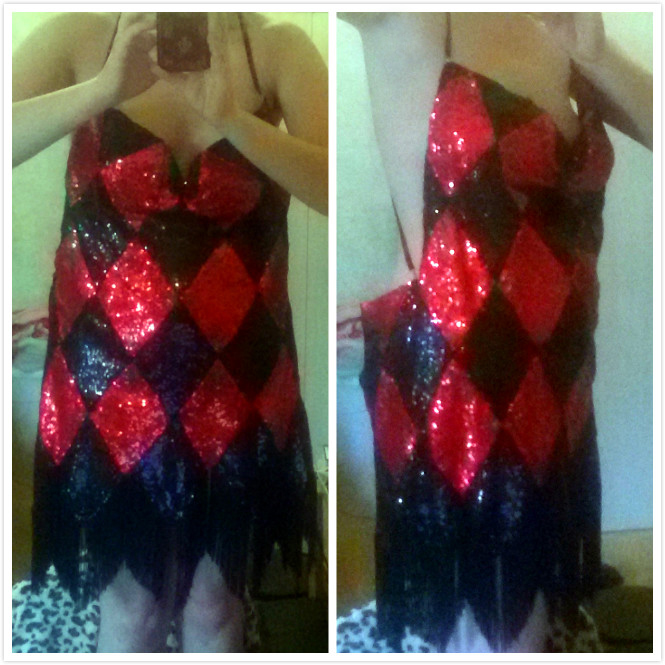
I also sewed bra cups into the front of the dress. I cut them off an old bra and pinned them in place while the dress was on the mannequin. I then hand-sewed them on to the dress.

No comments:
Post a Comment